Part 3
Drawing a Quad
Let's call a new method Draw() from our main application loop:
while (window.Exists)
{
    window.PumpEvents();
    Draw();
}
The Draw() method will include all of our per-frame commands for drawing our multi-colored quad using the resources we created in the last section.
The first thing we need to do is call Begin() on our CommandList. Before commands can be recorded into a CommandList, this method must be called.
_commandList.Begin();
Before we can issue a Draw command, we need to set a Framebuffer.
_commandList.SetFramebuffer(_graphicsDevice.SwapchainFramebuffer);
A Framebuffer is a device resource which controls where the rendered outputs go. The SwapchainFramebuffer is the application's main Framebuffer. It can be used to draw directly into the application's view.
At the beginning of every frame, we clear the screen to black. In a static scene, this is not really necessary, but I will do it anyway for demonstration.
_commandList.ClearColorTarget(0, RgbaFloat.Black);
Now that we have done that, we need to bind the resources that we created in the last section, and issue a draw call.
_commandList.SetVertexBuffer(0, _vertexBuffer);
_commandList.SetIndexBuffer(_indexBuffer, IndexFormat.UInt16);
_commandList.SetPipeline(_pipeline);
_commandList.DrawIndexed(
    indexCount: 4,
    instanceCount: 1,
    indexStart: 0,
    vertexOffset: 0,
    instanceStart: 0);
The vertex buffer is bound to slot 0. In our case, we only have one slot, but it is possible for multiple slots and multiple vertex buffers to be used. When we bind our index buffer, we need to communicate the format of data inside of it. Ours contains 16-bit unsigned integers (IndexFormat.UInt16). We issue a DrawIndexed command with four indices, one instance, and no offsets.
We are almost ready to see our colored quad. All that remains is to execute our commands, and swap the buffers of the main swapchain.
_commandList.End();
_graphicsDevice.SubmitCommands(_commandList);
_graphicsDevice.SwapBuffers();
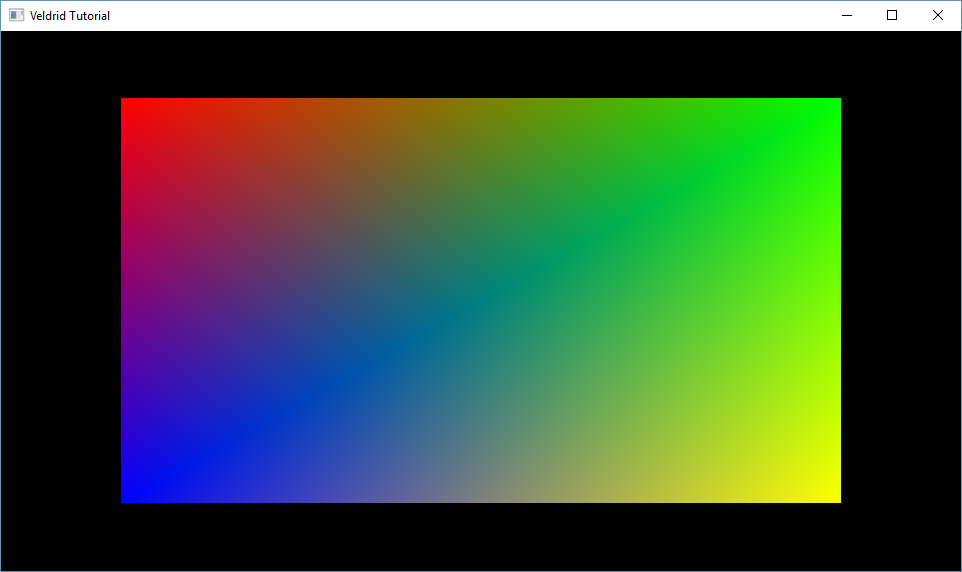
If you run the application now, you should see a quad being rendered, with a different color mixing from each corner.

Resource Cleanup
After our application's main loop, let's call a new method DisposeResources.
while (window.Exists)
{
    window.PumpEvents();
    Draw();
}

DisposeResources();
In that method, we will simply dispose of everything we have created, ending with the GraphicsDevice itself.
private static void DisposeResources()
{
    _pipeline.Dispose();
    _vertexShader.Dispose();
    _fragmentShader.Dispose();
    _commandList.Dispose();
    _vertexBuffer.Dispose();
    _indexBuffer.Dispose();
    _graphicsDevice.Dispose();
}
Wrapping Up
The completed project of this tutorial is available here. This is a simple example intended to demonstrate some of the core concepts in Veldrid. More advanced rendering techniques are possible using these and other features available in the library.
See the [NeoDemo] project in the Veldrid repository for a more complex application built on Veldrid. It uses the following techniques:
- Real-time dynamic shadows with three cascades
- Real-time reflections.
- Point lighting with configurable diffuse and specular components
- 2D shadow and reflection map previews
- ImGui integration
- Multiple framebuffer outputs and full-screen effects
- Configurable MSAA
- Multi-threaded rendering
- Live switching of graphics APIs